
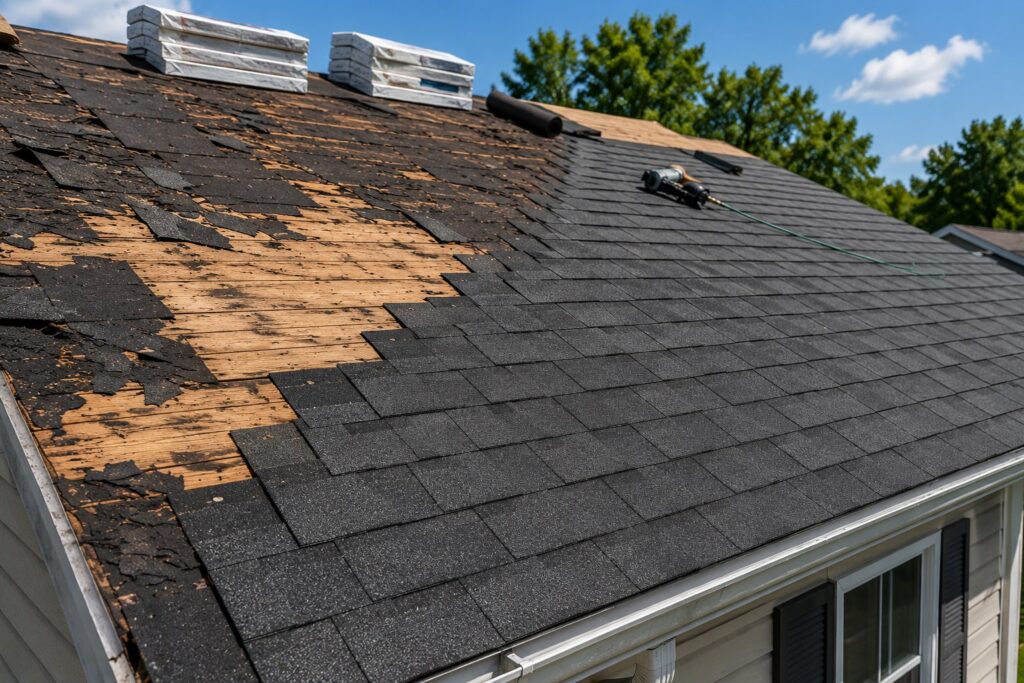
Investing in a new roof is one of the most important protective measures a property owner can take. A structurally sound roofing system keeps water out, improves energy efficiency, and protects the structural foundation of your home. However, replacing a roof is a significant construction undertaking that requires careful planning, skilled labor, and high-quality materials. Knowing what steps take place helps reduce stress and keeps your project on schedule from start to finish.
Understanding the full roof installation process ensures you can make informed decisions every step of the way. When working with NY Best Roofer, property owners receive clear communication, professional assessments, and structural care tailored to local building requirements. Whether you are upgrading an aging roof or responding to severe weather damage, knowing how the replacement unfolds prepares you for a smooth experience.
Initial Consultation, Roof Inspection, and Material Selection
The installation journey begins long before any shingles are removed. A comprehensive initial inspection allows contractors to evaluate the condition of your current roofing system, assess the pitch, measure the square footage, and check for hidden moisture damage. During this phase, NY Best Roofer works closely with property owners to select materials that suit their budget, aesthetic preferences, and performance needs.
Options range from traditional asphalt shingles and architectural shingles to metal, slate, and flat roof membranes. Along with selecting primary materials, decisions are made regarding underlayment, drip edges, ridge vents, and gutter systems. Once the project scope is finalized, the contractor secures necessary local permits and establishes a timeline for delivery and installation.
Pre-Installation Preparation and Emergency Roof Stabilization
Before heavy construction begins, site preparation is essential to protect your surrounding property. A professional crew will clear the perimeter, setup protective tarps over landscaping and outdoor furniture, and designate specific staging areas for heavy equipment and waste containment bins.
In many situations, roof installations are preceded by severe storm damage or sudden leaks that threaten structural interior damage. When severe weather strikes unexpectedly, immediate intervention is critical. Properties requiring emergency roof stabilization and tarping receive swift protection from NY Best Roofer to seal active leaks and shield exposed decking from rain until full replacement can begin. Securing structural temporary barriers prevents minor leaks from turning into massive drywall failures, framing rot, or mold growth. Once the structure is stabilized and safe, full installation preparations move forward without compromise.
Tear-Off and Substrate Inspection
With site precautions and temporary protections in place, work transitions to removing the old roofing material down to the plywood or wooden decking. Stripping the old system is crucial because installing new shingles over deteriorated layers hides rot and voids manufacturer warranties.
As old shingles, nails, and underlayment are stripped away, technicians perform a detailed structural inspection of the exposed decking. Any damaged, rotted, or sagging plywood sheets are removed and replaced with new CDX plywood or OSB panels. This creates a completely flat, structurally sound foundation capable of holding fast fasteners and supporting long-term load requirements.
Installing Protective Barriers and Drip Edges
With the decking restored, the crew installs protective underlayment to guard against water infiltration. A self-adhesive ice and water shield is applied along vulnerable areas such as eaves, valleys, chimneys, side walls, and roof penetrations. This membrane prevents water from backing up under shingles during ice damming or heavy wind-driven rains.
Following the ice barrier, synthetic underlayment is rolled across the remainder of the deck to provide a secondary water-resistant shield. Heavy-duty metal drip edges are then installed along the eaves and rakes to direct runoff cleanly into gutters and keep moisture away from fascia boards. Executing these steps meticulously guarantees that the interior layer of the roof installation process provides maximum protection.
Laying New Roofing Materials and Ventilation Setup
With protective barriers installed, technicians begin laying the primary roofing material. The crew starts at the bottom edge with specialized starter shingles, which create a wind-resistant seal along the perimeter. From there, courses of shingles or panels are laid in overlapping patterns using precise nailing techniques to withstand high winds and thermal expansion.
Flashing is fitted around chimneys, skylights, plumbing stacks, and wall intersections to divert water away from critical seams. Ventilation is also integrated during this stage. Proper ridge vents, soffit vents, or intake vents are verified to balance attic airflow, preventing moisture accumulation in winter and excessive heat buildup in summer.
Site Cleanup, Waste Removal, and Final Quality Inspection
Once every shingle, ridge cap, and piece of flashing is installed, the project shifts to cleanup and inspection. Roofing generates significant debris, including thousands of old nails and shingle scraps. A professional crew uses magnetic rollers across lawn areas, driveways, and flowerbeds to capture stray metal fasteners and clear away waste materials.
Finally, a project manager conducts a detailed final walk-through. They inspect seam seals, flashing fits, ventilation pathways, and overall alignment to ensure every detail complies with local codes and quality benchmarks. Following this thorough review, NY Best Roofer provides property owners with warranty documentation and maintenance guidelines to protect their investment for decades. Following a complete roof installation process ensures peace of mind, structural security, and improved property value.
Frequently Asked Questions
How long does a full roof replacement take to complete?
Most residential roof replacement projects are completed within one to three days, depending on home size, roof pitch, weather conditions, and material selection. NY Best Roofer ensures that every project stays on schedule while maintaining strict installation standards.
What should I do if my roof develops a leak before my installation date?
If active leaks occur before your scheduled installation, immediate stabilization is essential. NY Best Roofer provides prompt emergency roof stabilization and tarping services to protect your interior spaces from water damage until the complete replacement project begins.
Can new shingles be installed directly over old shingles?
While local building codes sometimes allow layering shingles, tearing off old roofing is always recommended. NY Best Roofer strips old materials down to the decking to inspect for hidden wood rot, repair structural damage, and ensure optimal warranty coverage.
How do I prepare my home and property before the installation team arrives?
Homeowners should clear driveways, move patio furniture away from the house, trim low-hanging tree branches, and secure fragile items inside wall cabinets. NY Best Roofer assists property owners with guidance on protecting surrounding landscaping prior to construction.
What type of warranty comes with a new roof installation?
A new roof includes manufacturer warranties covering material defects alongside workmanship guarantees covering labor execution. NY Best Roofer provides complete warranty documentation to ensure property owners enjoy long-term protection and peace of mind.